Connect by Payment Network ID
Bill.com enables you to send and receive ePayments if you’re connected via your Payment Network ID. You receive a unique PNI when you create a Bill.com account.
Jump to:
- Find your Payment Network ID
- Add a Vendor's or Customer's PNI
- Troubleshooting issues with connecting to a vendor’s or customer's PNI
- Complete the Network Connection
- Things to know
Find your Payment Network ID
- Select Network
- Select Access additional network features here.
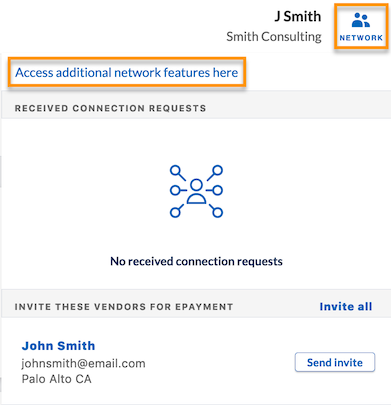
- Select My Network Profile and note your Payment Network ID (PNI)
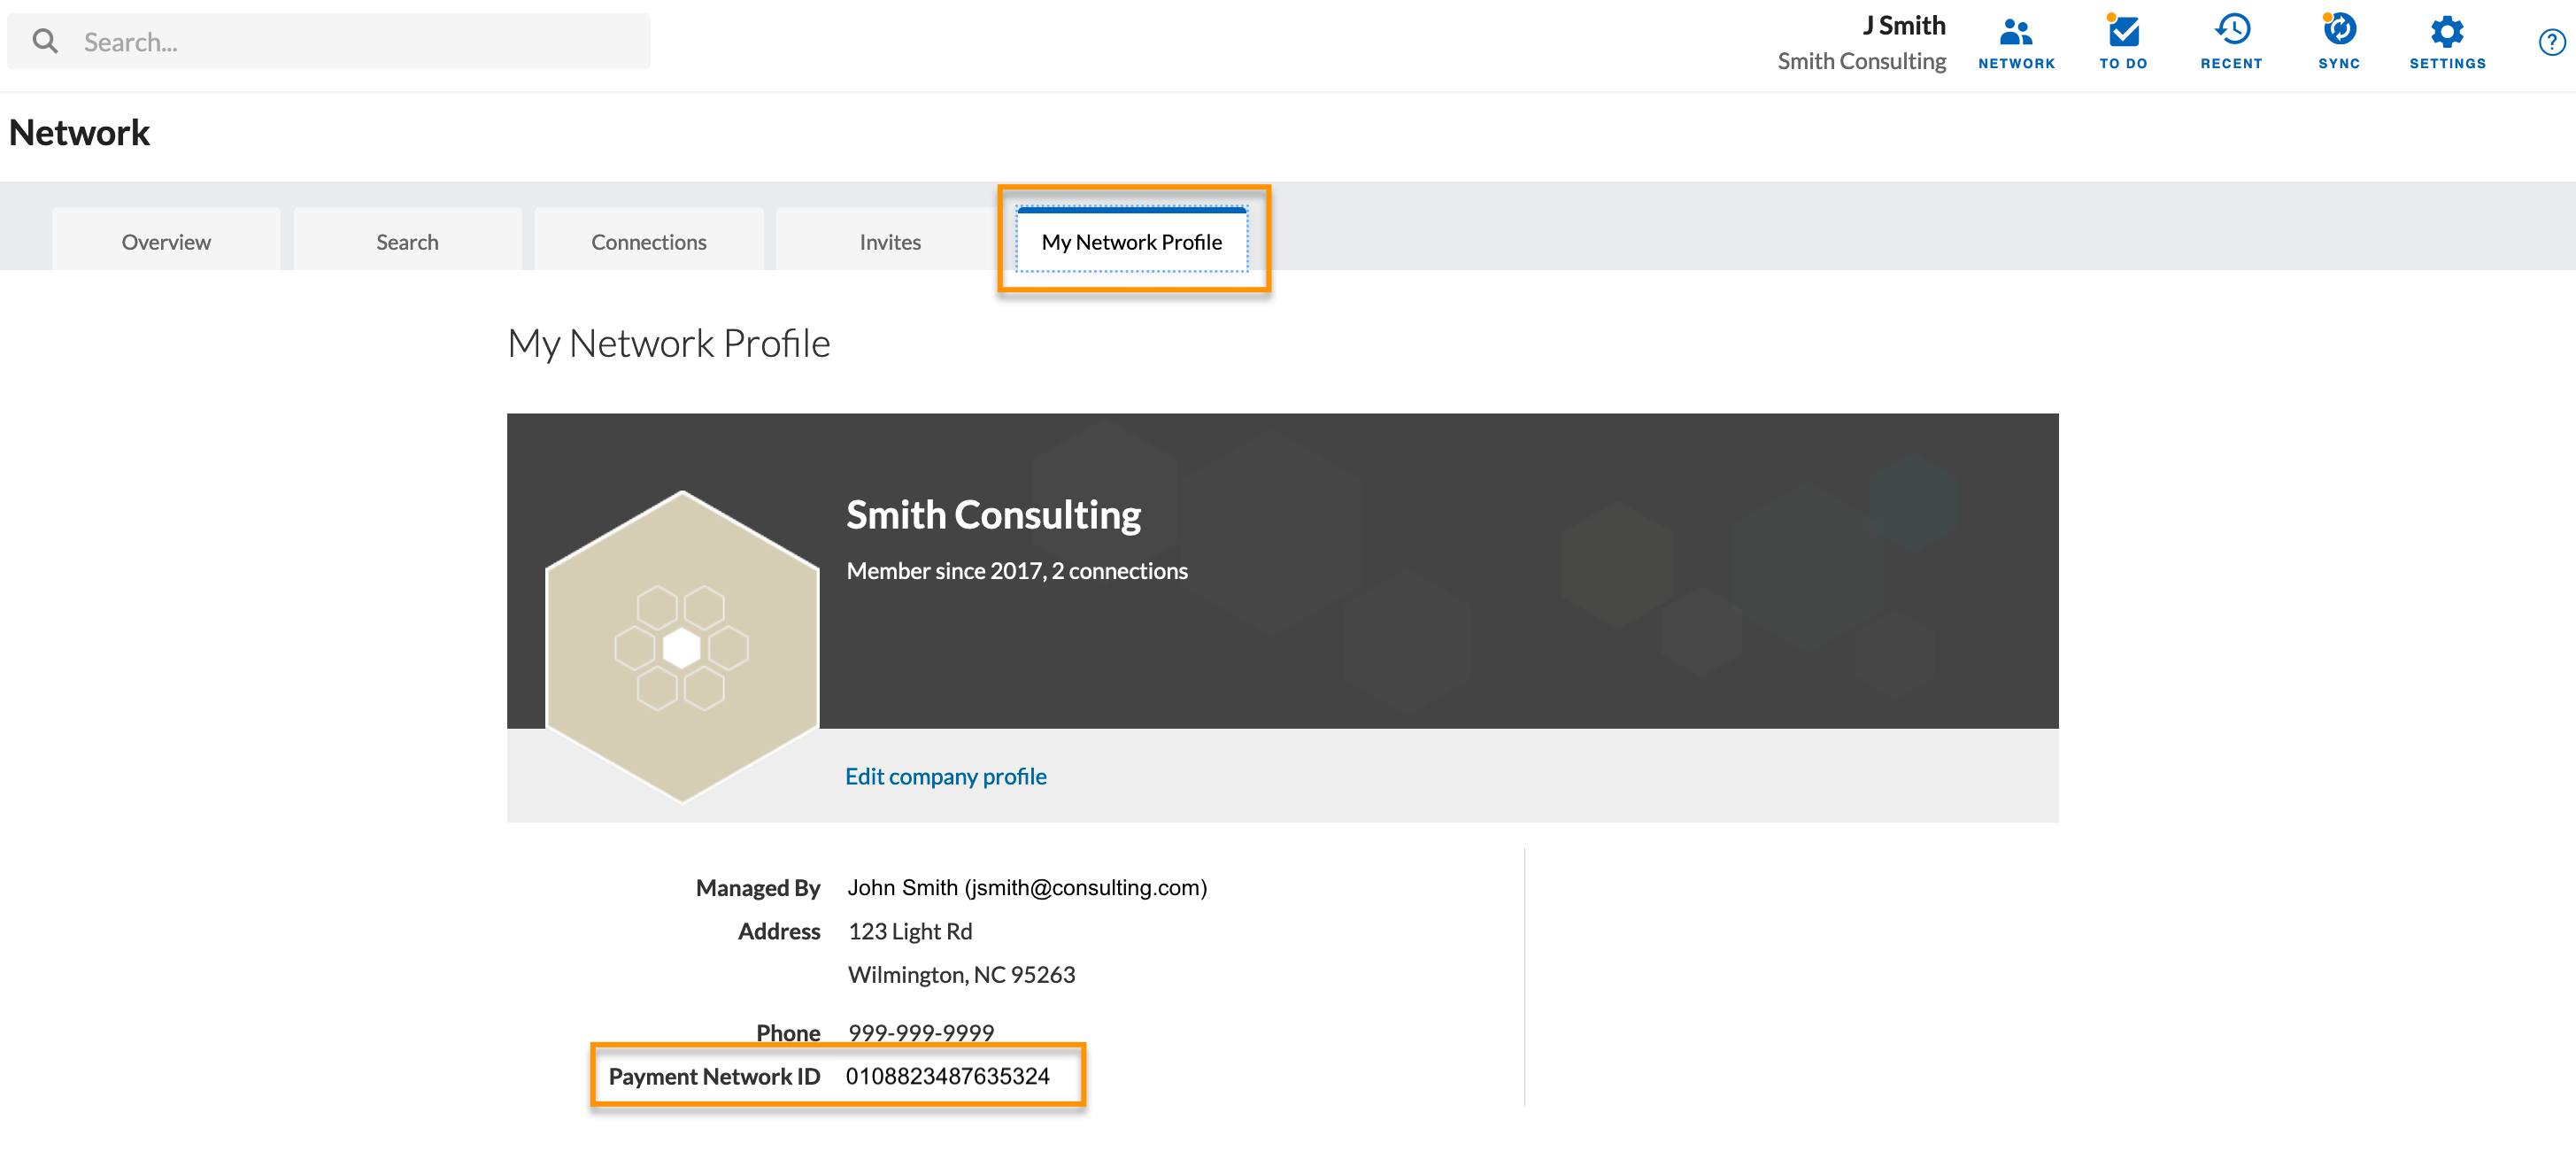
- Give your Payment Network ID (PNI) to your customer or vendor to enter on their side.
Add a Vendor's or Customer's PNI
- Select Customers or Vendors in the navigation menu Bill.com
- Select the vendor's or customer's name
- Select More actions
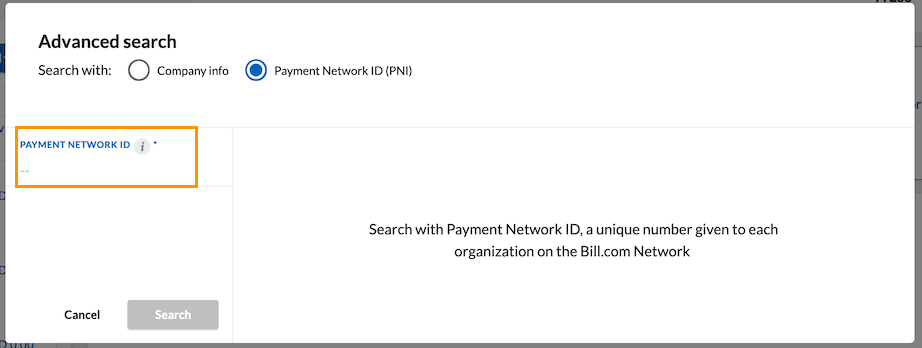
- Select Enter PNI

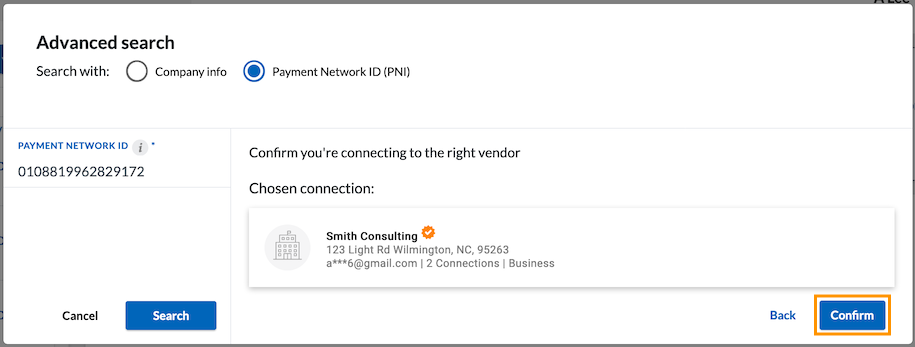
- Enter your vendor's or customer's Payment Network ID
- Select Search
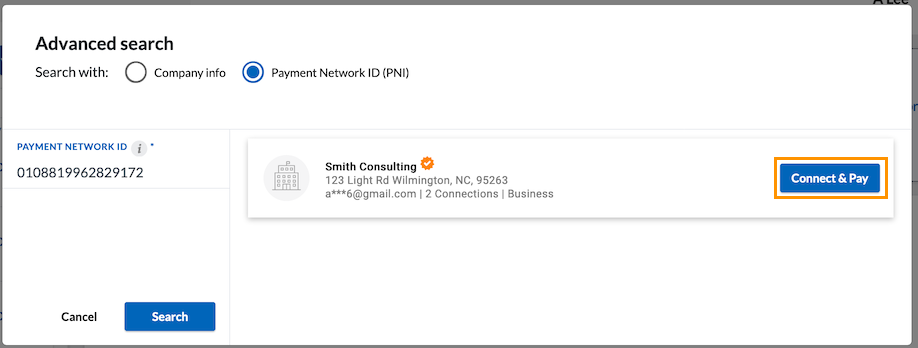
- Select Connect & Pay for vendors or Connect & Get Paid for customers
- Select Confirm
Troubleshooting issues with connecting to a vendor's or customer's PNI
If you don't see the option to enter your vendor’s or customer’s PNI, it’s likely due to one of these reasons:
- You’re already connected to the vendor or customer
- There's a pending invitation to the vendor or customer that you’ll need to resolve before completing the connection
Either way, you’ll need to check your account to find out which is the reason for your issue. Once you determine which is the reason you cannot enter your customer’s PNI, then you can move forward with finding a resolution.
-
Check for an existing connection
- Select Network
- Select Access additional network features here
- Select Connections
- See the list to view your connections
If you aren’t connected to the right PNI, then you’ll need to disconnect from the existing PNI, using the steps below, before you can connect to a new PNI.
-
Disconnect an existing PNI connection:
- Select Vendors in the navigation menu
- Select the vendor name to disconnect
- Select More actions
- Select Disconnect
- On the confirmation pop up, select Disconnect
-
Note: If there are pending or scheduled payments, you won't be able to disconnect from the existing PNI. You’ll either have to wait for the payments to clear, or manually cancel/void the payments. If the option to cancel/void isn't available, this means you'll have to wait until the payment clears before you can disconnect. But if nothing is pending or scheduled, you’re free to disconnect!
Once you’re disconnected, use the steps to Add a Vendor's or Customer's PNI to connect to the new one.
See if there's a pending invitation for the vendor or customer:
Select Network
Select Access additional network features here
-
Select Invites to view invitations received, sent, and pending.
If there is a pending invitation, you’ll need to cancel it before you can try to make a new connection.
- Cancel a pending invitation:
- Log in to Bill.com
- Select Vendors in the navigation menu
- Select the vendor whose invite you'd like to cancel
- Select More actions
- If you see Cancel Invite here, you can select that to cancel a pending invite, or go to step 5
- Select Invites
- Select the vendor whose invite you'd like to cancel
- Select Cancel Invite
Complete the Network Connection
To complete the network connection, three things must happen:
- Both the payer and receiver must be able to see one another’s PNI in the vendor’s or customer’s details section of their account.
- Both the payer and receiver must receive email notifications that confirm the two accounts are connected.
- Bill.com must verify the vendor’s bank account.
Things to know
- Once we verify a vendor's bank account, networked customers will receive ePayments.
- After you finish connecting, the previous 5 unpaid bills for your vendor will sync to their Bill.com account as receivables invoices.
Account Setup View all
Making Payments to your Vendor View all
Getting Paid by your Customer View all


